Thursday, 26 September 2019

White Pizza Dip

I don't post a lot of pizza on this blog.  But it would be my food choice for sure if I was ever stranded on a desert island.  I'd happily eat pizza every day.

It makes sense, then, that I would LOVE pizza dip.  I've tried three (yes, three) different pizza dips, and out of the three, only two have been worth mentioning.

THIS ONE from the lovely Jessica over at How Sweet Eats (who I've been following forever) is AMAZING.

Chock full of fresh herbs and roasted tomatoes...  Well - just you wait.

These are all the things you need for this dip.  Brace yourselves, if you live in my 'hood you know that fresh herbs come in those plastic packs and are pretty hefty on the price point.  So I would suggest that you make sure you have other recipes lined up so that you can make use of those herbs!

Or - if you are wizard at growing herbs indoors - simply pluck them off your plants.  I am not a wizard at growing ANYTHING.  Sadly.


Oh yeah.  There are four different kinds of cheese.  My arteries quivered in fear.

First things first.  Halve the tomatoes and roast them up.  The first time I made this, the smell of the cherry tomatoes roasting was so BEAUTIFUL.  I didn't even know that was a thing.  It made me want to do it on the regular and stick those little guys in everything.

After the tomatoes have roasted and cooled off, combine the cheeses.

First, the cream cheese.


Then the mozzarella and provolone.


And the parmesan.


Then some minced garlic.


Then all the herbs.


Add the roasted tomatoes.


Stir it all together and then top with even MORE cheese.


And bake it until it's all golden and melty.


And dive in with tortilla chips.


SOOOOOOO much cheese!!!


How could you not want to face dive straight into this bowl?


This is amazing just as written - and I would TOTALLY make it exactly the same way again.

That being said - I have ALSO made this with dried herbs (I KNOW *gasp*) and without the tomatoes.  Because I was feeling super lazy and didn't really feel like putting in all the effort.  And guess what - it's wonderful either way!

And it's SUPER easy to half if there are only a couple of people snacking on it *cough*orjustme*cough*.

This would most DEFINITELY be a dip that you should consider for your next movie night!

Friday, 13 September 2019

Cheesy Mexican Chicken and Rice Casserole

Fall means the return of that crisp, cool air (you know what I'm takin' about) - which means it's time to take out coats, blankies, and comfort food.

Don't get me wrong - I don't LOVE fall.  I so much prefer Summer, but Spring and Fall are directly tied for second-best.  Winter is dead last.  Which is horrible because, in Canada, winter lasts for approximately 325 days a year.

I just like Fall FOOD so much.  Casseroles, baked pastas, roast chicken, mashed potatoes, soups, stews, chili.  *SIGH*

Doesn't just the thought of all that make you feel and warm and cozy and carby inside?

With Fall in full swing, it means that people are running all over the place with school and activities and just life in general.

So I thought I'd share a pretty easy casserole with you!  Cheesy, tex-mexy, carby, and comforting - it's really perfection in a pan.

I want to say that this would make an amazing weeknight meal.  That being said, the recipe calls for cooking the rice especially for this dish and THEN putting together the casserole and baking it.  Which can add quite a bit of time.  So - yes - a quick weeknight meal this is, kinda.


First, cook up the rice with the chicken broth.  And let it cool slightly.


Spread the refried beans in the bottom of a 9 x 13 inch baking pan.


To the rice, add the chicken,


Enchilada sauce,


Cream of chicken soup, 


a can of green chiles,


Green onions,


Cubed cream cheese, 


Black beans,


Shredded Mexican Cheese blend,


Stir it all together really well and then spread over the refried beans.


Cover with foil, bake for 35 minutes, remove the foil, sprinkle with some more cheese, bake a little longer until the cheese is all melty.


And serve.


SO MUCH delicious in one pan.  Absolute perfection on a cold evening.  It's just comfort in a pan.  It has become one of my favorite casseroles to date.

You could double the refried beans if you want - they do get a little lost with everything else.  I haven't tried it yet, so if you do double the beans, let me know what you think!

The other thing I would do differently is cube the cream cheese way smaller.  It was wonderful just as it was, but I think it would be a little "extra" if the cream cheese was distributed more throughout the rice.

I know I mentioned that this - to me - was only kind of a weeknight meal.  I'm thinking of my friends who have kids in sports in the evenings and if they DO happen to have time to cook the rice and put everything together and bake it all for 45 minutes (I'm guessing this should take just over an hour from start to finish), then it would be a great weeknight meal - nice and hearty for the kiddos.  For my friends who get home from work at 5 and then have to turn around straight out the door - maybe not.  Again - I would love to hear your thoughts!


I hope you love this as much as I do!!!

Friday, 6 September 2019

Shrimp Enchiladas

A dear friend of mine hates cilantro. 

And I’ve read all kinds of articles about people who hate cilantro and that there’s an actual chemical in the brain that makes them hate it or some such thing.  And there are always memes and jokes that go around about people who hate cilantro.

When I had my friend over for dinner and we were having tacos and I found out she HATES cilantro I felt simply awful because half of the dishes I made for dinner had cilantro in them!!!!

One of my favorite smells in the whole wide world is lime juice and cilantro.  I wanna bottle that and wear it like perfurme.

So it’s HARD for me to make something like enchiladas and not have cilantro in them.

I wish I could tell you that one of the dishes I made for my friend were these enchiladas, but – sadly – it would not be true.

Ages later, I pulled this recipe out of the stash and set about making it.  To be honest, I wasn’t sure about how it would turn out.  There’s really not anything remotely “enchilada-like” about it.  No cilantro, no chipotle, no jalapeno, no lime juice.  Nothing.

Yeah.  I’m not sure what I was thinking either.


Start by melting some butter in a pan and cooking the shrimp until they are pink.  Remove the shrimp from the pan and allow to cool.


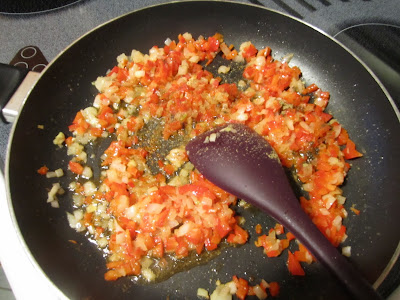
Melt some more butter and toss in the onion.


And red bell pepper.

Cook the onion and bell pepper until softened and add the spices to the pan.


Stir in the flour.


Add the heavy cream and stir together.  


Cook until thickened and stir in the sour cream,


Cheese,


And the tomatoes.


Stir in the shrimp.  Don’t be like me.  Make sure you cut up your shrimp BEFORE adding it back to the pan.  It’s much easier to do then after its all coated in sauce.  


Spread 1/3 cup of the shrimp mixture down the middle of a tortilla, add some cheese and roll it up really tightly. 

Here’s where I got a little nervous.  I personally like saucy enchiladas.  Usually you have sauce to pour over the top of the enchiladas and they bake in that sauce and they’re all cozy and creamy and wonderful.

But there was none of that with this recipe.  I kept my fingers crossed and chucked them in the oven.

I REALLY expected these to be underwhelming.  I was really prepared for the tops to be all cardboardy and dry.  And bland.  And etc etc.


What surprised me was how creamy and delicious they turned out!  Not a traditional enchilada in any sense, but really delicious!  Everyone at the table enjoyed them – I even got asked for them again! 

There is really nothing I would do differently here.  They just… “work”.  Easy delicious and perfect for people who hate cilantro.  So now you know what to serve on Taco Night for that one friend who hates cilantro!


Monday, 2 September 2019

Twix Brownies

I’ve never been the biggest fan of brownies.  I much prefer cake or pie.  Probably because I’m very specific about brownies.  They need to be chewy and dense and almost like they’re not really cooked.  And have icing.  Brownies need icing.

The other part of this is that I don’t often make brownies because I can never quite tell when they’re done.  Leading to dry brownies.  Which are gross.  Well.  Any baked good that is dry is gross.  But – like cookies – brownies will often look uncooked even they’re done.  If you cook them according to the recipe time and take them out – they’ll finish cooking themselves on the counter.

I saved this gem of a recipe on Tastespotting a millennia ago and finally got around to it.  This happens to me so often that you’re probably tired of hearing it – but I’m so disappointed that I held on to it for so long – it’s SO good!!!

Up front – it’s fairly involved.  It is four layers of happiness in a pan.  It’s definitely a commitment.  Plus you’ve got to unwrap all those caramels.

Start with the brownie layer. 


In the bowl of a stand mixer, combine the sugar,


And super soft butter,


And three eggs,


And vanilla,


The salt,


Then the cocoa powder,


And finally the flour.


After the brownie layer is done baking, start on the shortbread layer.  You have to wait until the brownie layer is cooled before spreading the shortbread layer.


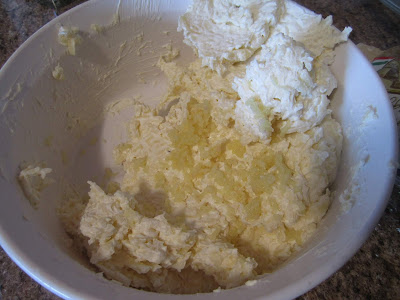
Combine the cream cheese,


Sugar,


And shortbread cookie crumbs in the bowl of a stand mixer.


Then spread that mixture over the cooled brownie layer.  I found the easiest way to do this was to drop the mixture in dollops and spread using an offset spatula.  And chuck it in the fridge to set.


Then is the caramel layer.  Brace yourself because you’ll have to open every single one of those little caramels.


Combine the caramels and milk in microwave safe bowl and melt and stir together until combined.


Then spread the caramel mixture over the shortbread mixture.  Chuck that in the fridge while you make the top layer.


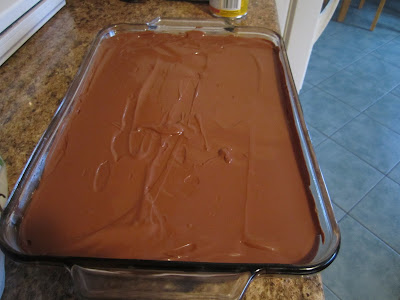
Lastly, melt together chocolate chips and shortening.


Spread over the caramel layer.


Chuck in back in the fridge to set.

And then cut it into squares and eat!!


Okay – so the picture totally doesn’t do this square justice AT ALL (my deepest apologies to the lovely Holly who’s blog this recipe came from – her pictures are stunning and I encourage you to check it out!).  I really need a better picture plan – especially since we’re usually breaking into dessert when it’s dark outside (thank you Canadian Winter!).  Does anyone have any experience with those ring lights?  Are they worth the cost?

Back to the brownies.  These were SOOOOO good!!!!  I do encourage you to keep them in the fridge though as I found that with lots of time out on the counter, the caramel started to escape (melt) from the cut pieces.  If you want them a little soft when you serve, I would say take them out about 15 – 20 minutes before serving.