Monday, 27 November 2017

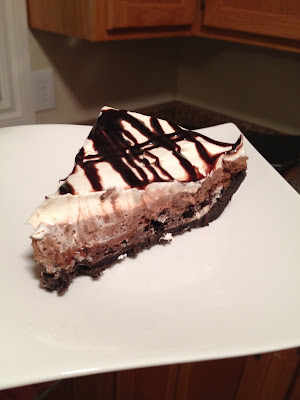
Cookies and Cream Chocolate Pie

It has been a busy week in my house!  I had two extra special visitors staying with me and it was such a treat.  My niece is just wonderful and it was so great for us to spend some time together.  And their dog, Kraken - a long-hair Chihuahua, was my shadow every second I was home.

They had me so tuckered out at the end of each day, I could hardly keep my eyes open!

And I saved as much of the boring stuff (aka - grown up chores) from my day until after my niece had been tucked in for the night - and I kind of forgot about you.  Sorry.

Now that they've gone back to their Mom and Dad, I'm sort of lonely for them.  It'll wear off soon.  I always feel that way after visitors go.

So to cheer me up, I figured the only logical thing to do was to share this delicious Cookies and Cream Chocolate Pie.

I gots the smarts.

Here's what you'll need.


Start by combining melted butter and cookie crumbs in a bowl.  Then press the mixture into the bottom and up the sides of a 9-inch pie plate.


Toss the crust in the fridge.

Then, in the bowl of a stand mixer, combine the cream cheese,


and the icing sugar.  Beat until combined.


Fold in some Cool Whip.


Gently stir in some cookie chunks.


Spread that mixture evenly into the cookie crust.

Then, whisk together the chocolate pudding and the chocolate milk.


Fold some Cool Whip into the pudding mixture.


Spread the pudding mixture evenly over the cream cheese mixture.


Then spread more Cool Whip overtop of the pudding mixture.


So it looks like this.


Drizzle with fudge sauce.  I was KINDOF sorry I did this - but only because the Cool Whip was so pretty.  (refer to picture above)  But it was really tasty.


Refrigerate until ready to serve.


I loved this easy, cookie-filled pie.  I also loved how easy this was to make.  If you're all prepared, it takes maybe 1/2 an hour to whip (no pun intended) together.  I can't really be sure exactly, because things like this always take me much longer because I stop and take pictures - but 30 minutes sounds about right.

Sometimes fast and delicious is the name of the game. 

I kindof wish I had this pie right now.  *insert bummed out face here*

Enjoy! -Heather

Thursday, 16 November 2017

Key Lime Lasagna

I grew up eating Gram's Special as a Christmas dessert.  But we don't call it Gram's Special.  We call it Sex in a Pan.

But in front of my 8 year old niece, we call it LOVE in a Pan.

And it's one of my favorite desserts.  It's just not Christmas without it.

Little did I know - there are a zillion variations of this beloved dessert!

Let's talk about this one.


In a large bowl, combine the flour,


and the sugar,


And the crushed macadamia nuts.  I whirred the macadamias through a food processor, so the crumbs were fairly fine, but you could leave them a little chunky too.


Add in the melted butter and stir to combine.


Press into the bottom of a 9 x 13 inch baking pan and bake.


The next thing to do is make the key lime pudding.  This needs to be cooked and cooled completely before adding to the pan.


In a medium sized sauce pan, combine the cornstarch,


Sugar,


lime juice,


Lightly whisked egg yolk,


And the butter.  Cooked until the mixture has thickened and coats the back of a spoon.


Set aside to cool.  Once the macadamia nut base has cooled completely and the key lime pudding has cooled completely, prepare the cream cheese layer.


In the bowl of a stand mixer, combine the cream cheese, vanilla, and icing sugar.


Add in the Cool Whip.


And fold together.


Spread evenly over the macadamia nut layer.  Place in the fridge to set.


Add Cool Whip to the Key Lime pudding layer.  Add a little green food color if you'd like!


Spread this evenly over the cream cheese layer.  Top with additional Cool Whip and toasted macadamia nuts.


Chill overnight to set.

With my Mom's original recipe, it says that it may only need a few hours to set, but I've found with her recipe and all the others that I've tried, that overnight (24 hours) really is best for a solid set. 


I loved the very tropical feel of this version!  The combination of the tangy key lime  and the cream cheese was perfect for me.

One of the things I love the most about this particular dessert is that you can make it in advance.  So - you can make it the day before you have guests or a special dinner you might be making this for and that would give you more time - without sacrificing any quality.  Because not only does it take time to set - the flavour also improves overnight as well!

Question about when I would serve this....  Anytime.  During the Winter when I need something bright and reminds me of a beach vacation.  During the Summer when it's hot and I need something cool and not very heavy.

As for the key lime part.  When I travel to the States, I buy bottles of Nellie and Joe's Fresh Key Lime Juice and freeze it in 3/4 cup portions.  (My two favorite Key Lime Pie recipes both call for 3/4 cup of juice - hence why I freeze it that way).  If you can't get your hands on the Nellie and Joe's stuff, and if you have it in you and you see fresh key limes in the grocery store, you are welcome to juice those little guys.  But it'll take you forever.  You could buy regular sized limes - the flavour is different, but it'll serve the purpose.  Don't, PLEASE DON'T, buy the bottled stuff.  You're better off juicing limes by hand as the flavor is significantly better.

I'm waiting for the day we can order the Nellie and Joe's stuff from Amazon.ca.

Enjoy! - Heather

Wednesday, 8 November 2017

Honey Sesame Chicken

I know a lot of the recipes I feature on the blog are somewhat time consuming.  All are worth it though!  (trust me)

So let's do a recipe that is delicious, tastes like you spent a ton of time on it, but really - you were hanging with your favorite people.

Here's what you're gonna need.


Put the chicken in the bowl of a slow cooker and season with salt and pepper.


Then, in a separate bowl, combine the soy sauce, and rice wine vinegar,


Tomato paste.


The garlic.


Ginger (fresh.  Man I love fresh ginger).


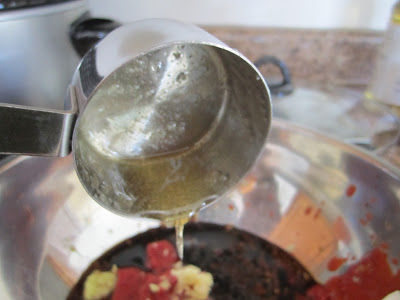
the honey and water.


The sesame oil.


The onion powder.


And the sriracha sauce.


Whisk it all together really, really well.  Then pour it over the chicken.


Set the slow cooker to cook on low until the chicken is cooked.  About 5 hours - but it depends on your slow cooker.

Once the chicken is cooked, remove it from the bowl.  Whisk together the cornstarch and water until smooth.


Pour the cornstarch slurry into the cooking liquid.  Straight up - it will look a little gross, but don't worry.  Whisk it all together.


Then you're going to turn the slow cooker to high and cook the liquid for like 20 minutes to thicken it.    While the liquid is cooking, shred the chicken.  I like to not shred my chicken too TOO much because it will shred more when I stir it into the sauce.


After the sauce has thickened, stir the chicken back into the cooking sauce and cook for a few minutes just to heat the chicken through.  (Covering the chicken with aluminum foil would also be good!)

Once the chicken is heated through, serve on rice with green onions and sesame seeds for garnish.


And you're definitely going to want to serve rice here.  Last week when I shared the Swedish Meatballs, I said mashed potatoes.  This week.  RICE.


This chicken comes out tender, smoky and sweet, and tangy.  It would be perfect for the dead of cold winter and even the middle of summer.

I'm not sure about how your kiddos will love it, but my niece chowed it down without complaining.

I loved how EASY this recipe was.  How little hands on time it needed and how amazing it turned out. 

Low effort - big rewards.

I hope you like it as much as I do! - Heather