I keep my rolling pin in the oven drawer. But I'm always wondering about what's getting on the rolling pin. And I would like to just pull it out and use it without worrying about wiping it down.
Not that the drawer is dirty or that I have to wipe the pin down - it's just a weird quirk.
I've been wrapping the rolling pin in plastic wrap, but that seems like a waste.
I had this old tea towel that could dry, like, one dish before it was sopping wet and I had to switch it out. I thought it would be perfect cover for the rolling pin.
Honestly, I don't even remember what I googled. I just started looking around.
I came across a draw-string bag tutorial by Kitty Baby Love. I read it over and over again. It seemed to be exactly what I wanted to do, but with two open ends except for one.
Now. I'm going to show you what I did, just for interest's sake, but this is the first time I've sat in front of a sewing machine in maybe 15 years. Maybe more. And I think there was only ONE time I actually MADE something with a sewing machine. It was a pair of boxers in Home Ec. They had hearts on them.
And because this is a little more complicated - and I HIGHLY recommend that if you are interested in making a draw-string bag or a rolling pin cover like this one, absolutely visit Sara's blog.
Also, I had no idea how to thread the sewing machine. I thought I had it right, but after watching a very helpful video on You Tube, I discovered I had it wrong. I also tested out a couple of different stitches for this project and a different one that I was doing the same day.
Let's start with what I used.
First, the thread. I just used white, but you could use any color your heart desired.
Then you need an old tea towel that only dries one dish. Like this one.
I started by cutting off the finished edges of the tea towel.
Then, I folded the tea towel in half lengthwise and cut on the folded edge, so I would have two pieces.
I marked with a pin 2 inches down from each short edge on all four ends, on both sides - so 8 pins in all.
I sewed both long sides with a single stitch 1/4 inch from each edge, starting after the pin and stopping just before the pin on the other end.
After the edges were finished, I folded back the un-sewn edges of the towels in the 2 inch sections to 1/4 inch.
Then sewed them down.
PS - this took FOREVER.
After that was done, each of the four short edges get folded over 1/4 inch. Sara didn't sew these edges, but because of my inexperience, I decided to sew these edges down.
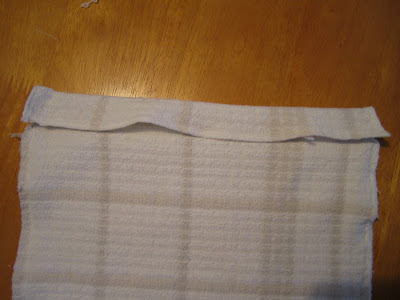
After all four short edges have been folded over 1/4 inch and sewed down, I folded the short edge over again so that the "finished edge" would meet the bottom of the 2 inch section.
Then I sewed those down. This creates a casing for the drawstrings.
Turn the bag right-side out.
Remember those finished edges that I cut off in the beginning? I kept those.
I used a safety pin and threaded those bits through the casing.
And that's it!
Now, it's not very pretty, and it's not perfect. But as it will not be put on display in the Louvre any time soon, I'm not terribly concerned about it.
And I'm pretty happy with it.
I hope this maybe inspires you too!
This is the Cane girl - with very sore fingers from pinning - signing off.


No comments:
Post a Comment