Tuesday, 16 October 2012

Crab & Swiss Melts

Don't you sometimes just need a quick and easy lunch?  You know - not just your standard tuna fish sandwich or a little bowl of soup or something like that?

Well, here's a recipe that's going to be right up your alley.

Is it just me or does this kind of sound like an informercial?

I scooped this recipe up from Allrecipes.  I figured it looked pretty yummy.

And, really, couldn't be easier.  Although I did make a couple of slight changes - I left out the hot sauce and added green onions (for color), and a little bit of Old Bay, to draw out the flavour of the crab. 


Here's how to do it.

In a high-sided small bowl, beat the cream cheese until fluffy.


Add in the garlic.


Then salt and pepper.

Then the Old Bay - I think I used a scant 1/8 teaspoon, but it wouldn't have hurt to use 1/4 teaspoon or more.


Then the green onions.


Lastly add the crab and mix together.  The recipe calls for 1 cup, I had two 6 ounce cans so I used both.  I think that might have added up to 1 cup....  I'm not sure - for the first time ever I didn't measure it out like a crazy person.

I put this together first thing in the morning and put it in the fridge until we were ready for lunch.

When we were ready for lunch, I sliced up Italian bread nice and thick.  Then divided the crab mixture between the pieces and evenly spread it around each piece.


And then topped each slice of bread with shredded Swiss cheese.


Once the melts are ready, bake in a 425 degree F oven for 10 to 15 minutes, until the cheese is melted and lightly browned. 


Mine didn't really brown - and if you really want to have a browned topping and it's not working out just baking - I would suggest turning on the broiler to brown up the cheese.  Totally up to you.


While these were good - they didn't blow the top off my head or anything.  There might have been a little too much cream cheese - the crab sort of got lost in the mixture.  I would recommend reducing it to about 3/4 of the package. 

But it was definitely a nice change from the ordinary.

This is the Cane girl - signing off.

Friday, 12 October 2012

Making the Swiffer Wet Jet more Environmentally Compatible

There are products on the market today that make life so much easier.

Take, for example, the Swiffer Vac.  I personally LOVE this device.  I hate sweeping because the broom doesn't get everything.  I love that the Swiffer vacuum sucks up everything and that the cloth picks up what the vacuum misses.  The only quam, I guess you could call it, is that the battery life is not the greatest.  I wish it would last longer.

I e-mailed the Swiffer people about it, and they kindly got back to me, however, I don't think they'll be rushing into R&D to create a new and improved Swiffer Vac battery just for me.

Or maybe they will?

On to the Swiffer Wet Jet.


I REALLY like this device.  I have bad knees and find it difficult to get down on my hands and knees to hand wash the floor each week. 

I'm sure the next thing you're going to say is that I should just use a mop.  But mops freak me out.  The bacteria and mold and yuck that accumulates on the mop head freaks me out.

I don't, however, like two things about the Wet Jet.

First of all, the absorbent cleaning pads are way too expensive.  Ridiculously expensive. 

Secondly, and maybe most importantly, I detest the environmental impact the cleaning pads make.

Maybe the second thing should be first.

I guess my only two questions would be - why don't the Swiffer people make something reusable?  Or biodegradable?  Don't we live in a "green" era?

In a brief moment of insanity, I decided to forsake my Wet Jet and switch to a Rubbermaid Reveal.

I liked the idea of the washable pads most of all, and I was very excited to begin a new chapter in my floor washing history.

But the first time I used the Reveal, my bubble was immediately burst.

The construction of the Reveal was incredibly cheap.  The sprayer, as opposed to a powered-automatic spray like the Wet Jet, was a pump-action sprayer.  But it seemed to stick after the first spray, and then only sprayed little droplets.

Basically, I hated everything about that thing.

Except for the pads. 


Those I loved.

Back to the Wet Jet, the bottom of the Wet Jet has these velcro strips on the bottom that the cleaning pads stuck to.


The Reveal pads stuck to the Wet Jet just fine, but they were a pain to pull off.  And then the velcro strips started pulling off.

So here's what I did.

I pulled the two remaining velcro strips off the bottom of the Wet Jet.


Then I put the Reveal pad under the bottom of the Wet Jet, just as though the velcro was still there.  (But it's not)


Then I folded each end and held it in place.


Then I pinned elastic into place.


After all four corners were pinned with elastic, I sewed them down using a type of zig-zag stitch on the sewing machine.


And you know what?  Even though I'm pretty positive I dulled the needle on my sewing machine and I stabbed myself two hundred thousand times, the elastics are on the washable pads, they fit snugly and don't come off when I wash the floor!


I am ENAMORED once again with my Swiffer Wet Jet.

I'm sorry I can't provide a pattern of any kind - it really was just holding and pinning and eyeballing.

This is the Cane girl - still with swollen hands - signing off.

Sunday, 7 October 2012

Fall Maple Mania: Maple Mousse Cheesecake Tarts

If you're a regular purveyor of Tastespotting, you can see patterns that evolve throughout the year. 

I only notice that type of thing because I'm totally nuts.

For example - Valentine's Day rolls in and in the midst of a dark, bleak Winter, our eyes are filled with foods and treats in all shades of red.

When the spring rolls around, there are tons of bright, spring inspired treats, salads, ice creams, etc. as everyone sheds the dark and cold of Winter and lets go of their soups, stews, and comfort food.

When there's a National "insert whatever food here" Day, there are a zillion pictures of that particular food.  Oh - did you know there's pretty much a National "insert whatever food here" Day almost every day?  It's true - you should Google it.

After reading this of course.

And after Summer comes to a close, and Fall draws us closer to Winter - and Thanksgiving and Christmas - we are tempted by pumpkin-flavoured treats, breads, and entrees of all different kinds.

For myself in particular, I'm not the biggest fan of pumpkin-inspired food things.  Although you should know that I practically beg my Mom to make me Pumpkin Squares every year....  But that seems to be the only "pumpkiny" thing I like.

For this little blog, I wondered what I could do to usher in a new Winter.  Although I'm hoping it will stay away a while longer - I think it's bound to be a whopper again this year.

Maple flavoured things seemed to be right up my alley.  Aside from citrusy flavours - maple is another flavour favourite that wins my heart every time.

And it's only fitting that it would work out that way - since I'm a born and bred Canadian girl.

There's no better maple syrup than that of the maple trees from Canada.

I came across Lauren's blog, Lauren's Latest, recently - she's a Canadian girl now living in the States and she talked about one Christmas when she delighted in receiving two big bottles of Canadian maple syrup in her stocking....  It never occurred to me that true and delicious maple syrup would be so hard to find in the States - given that it is so accessible to us here in Canada.  Aside from Vermont - those guys have it MADE.

Kind of how I want to go pick up some Biscoff spread, but I can't get it here in Canada.  I have to wrangle someone who's going to the States to bring some back for me......

I might be the strangest person I know.

Anyway - I wanted desperately to kick off Fall Maple Mania with Lauren's Maple Mousse Cheesecake Tarts.  Lauren made them look so light and fluffy that they were probably completely sinful.

And I'm okay with that.

So, here's the official start to Fall Maple Mania.  You're welcome.

Let's kick things off with the base.


What you see above this line of text is the SECOND box of maple sandwich cookies that I bought.  I mistakenly bought a generic brand of cookies originally.  I thought "how bad could they be?".  Opened the box and was bitterly disappointed.  So I went and bought more.

Ahem.

Crush up 8 maple sandwich cookies in the food processor until they are finely crumbed. 


Then melt some butter.  Carefully.  This butter actually exploded in my microwave. 


It was fun to clean up.

Then mix the cookie crumbs and butter until all the crumbs are moistened.

Press into the bottom of four 4-inch tart pans.


And put them in the fridge.

Then make the filling.


First, whip up the whipping cream until soft peaks form and set aside.


Then, in the bowl of stand mixer, beat the cream cheese just a little.


Then add the maple syrup.


Then the sugar.


Then the sour cream.


Then vanilla and maple extract.


And beat together until well combined and smooth.


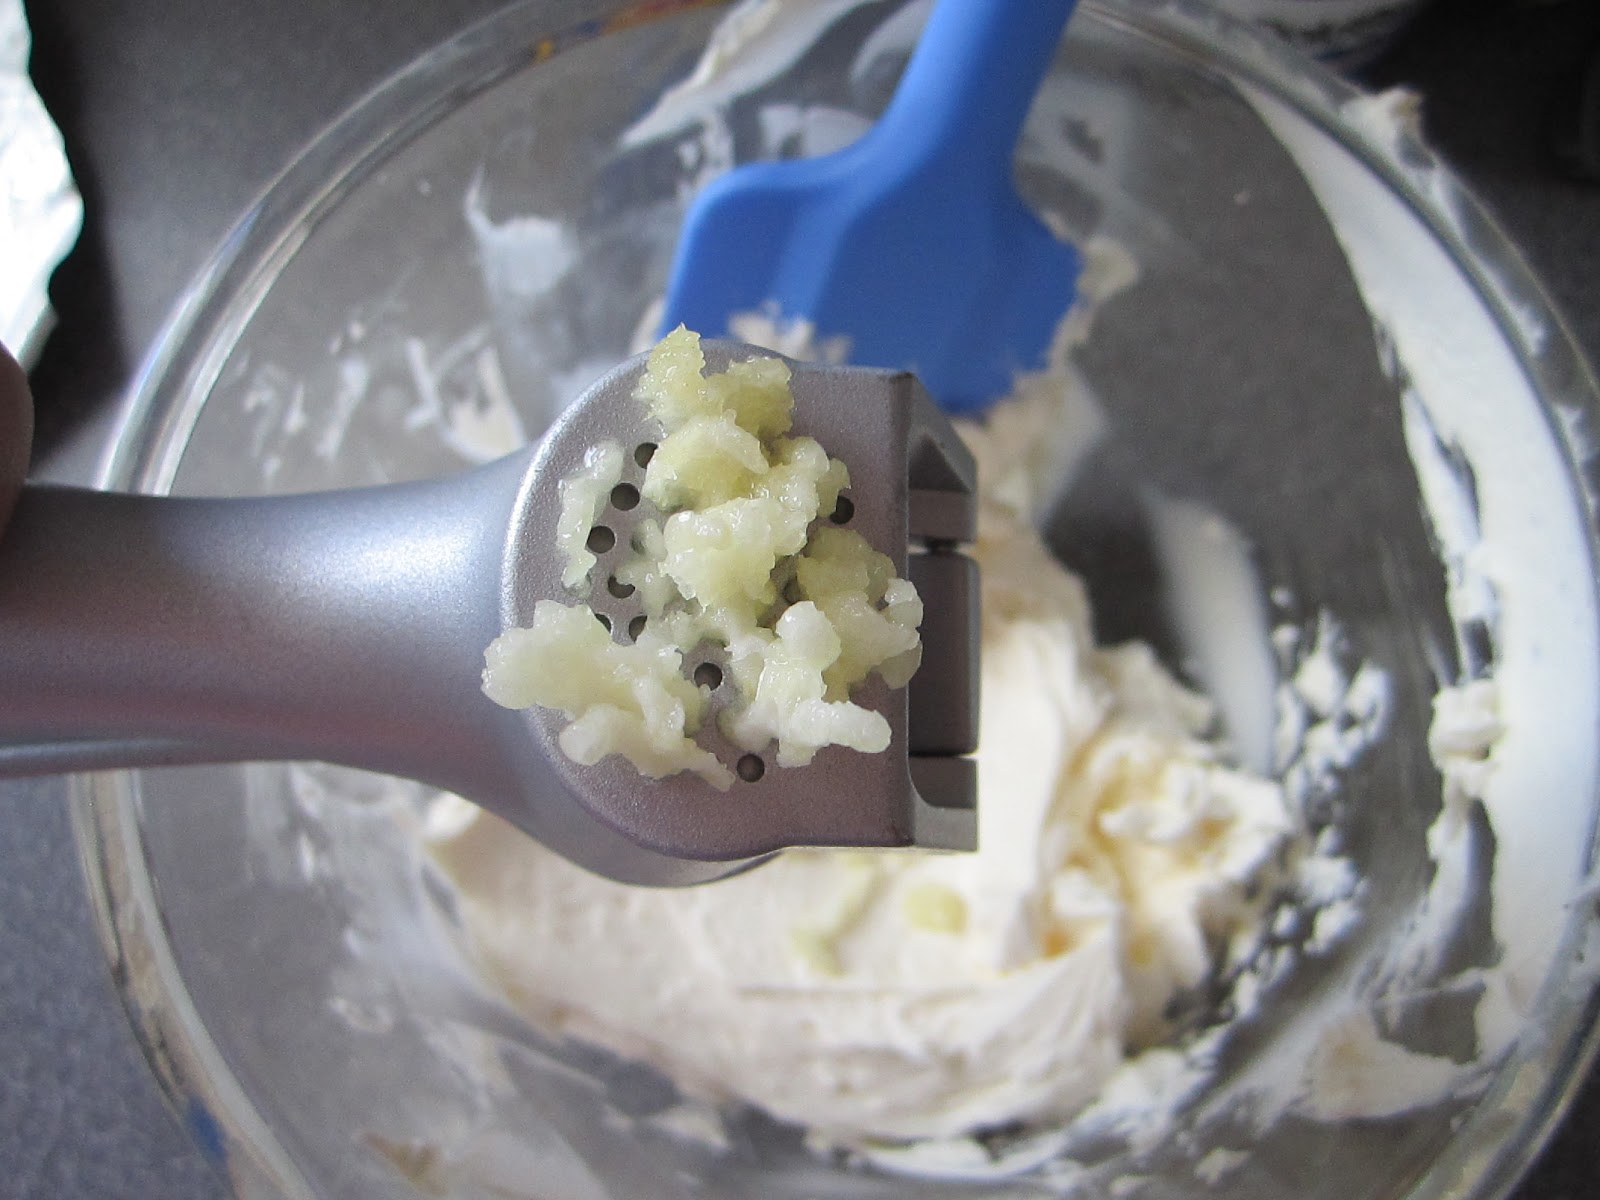
This.  Is not smooth.

The picture isn't very good because I was totally busy having a complete meltdown because it was lumpy. 

The only reason I can think that this happened is because I didn't take out the sour cream early enough and because the sour cream was cold it seized up the cream cheese and became lumpy.

So I left it for - um - about 40 minutes.  Just sitting there.  And the whole time I gave it the evil eye and willed it to fix itself.

Then I tried beating it into submissionly creaminess, but to no avail.

Then I passed it through a fine mesh sieve and that seemed to work well enough.  But it was still lumpy.


It doesn't look too bad here - but believe me - it's lumpy.

So, I hung my head in defeat.  It was too late to start over - these things HAD to get in the fridge if they'd be ready for dessert that night - and I carried on.

Remember the whipping cream that got whipped up earlier?  That gets folded into the cream cheese mixture - by hand so it doesn't deflate.

Or whatever.

I was a little worried about this one because I seem to have a heavy hand.


Once all the whipped cream is combined with the cream cheese mixture, divide the filling between the four tart shells.  Smooth and make pretty.


SEE! *bawl*  Lumpy!!!!

I braced myself to be embarrassed, and put the tarts in the fridge.  Lauren recommends 1 to 2 hours or longer.

After dinner was finished (which was the Dorito Chicken by the way!), I scurried over to the fridge and pulled the tarts out, and topped them with walnuts.


I then shame-facedly told Dee and Nate that I apologize many times over - but the filling is lumpy.  *sniff*


They each took a bite and said "What?  They're not lumpy.  They're AWESOME!"

To which I responded "Liars, don't save my feelings - be honest.  I messed up."  Well, maybe it wasn't exactly that - but it was along those lines.


I followed suit and tentatively took a bite.

You know what?

They didn't lie.  Something MAGICAL happened in my fridge!!!


The tart was creamy and sweet.  The maple flavour was there, but more prominent as an aftertaste.  I know that sounds weird, but it's true.  And the best part - NO.  LUMPS!

These tarts were so wonderful - it was a perfect way to kick off Fall Maple Mania!

This is the Cane girl, surrounded by yellow and gold - signing off.

Tuesday, 2 October 2012

Homemade Rolling Pin Cover

I keep my rolling pin in the oven drawer.  But I'm always wondering about what's getting on the rolling pin.  And I would like to just pull it out and use it without worrying about wiping it down.

Not that the drawer is dirty or that I have to wipe the pin down - it's just a weird quirk.

I've been wrapping the rolling pin in plastic wrap, but that seems like a waste.

I had this old tea towel that could dry, like, one dish before it was sopping wet and I had to switch it out.  I thought it would be perfect cover for the rolling pin.

Honestly, I don't even remember what I googled.  I just started looking around.

I came across a draw-string bag tutorial by Kitty Baby Love.  I read it over and over again.  It seemed to be exactly what I wanted to do, but with two open ends except for one.

Now.  I'm going to show you what I did, just for interest's sake, but this is the first time I've sat in front of a sewing machine in maybe 15 years.  Maybe more.  And I think there was only ONE time I actually MADE something with a sewing machine.  It was a pair of boxers in Home Ec.  They had hearts on them.

And because this is a little more complicated - and I HIGHLY recommend that if you are interested in making a draw-string bag or a rolling pin cover like this one, absolutely visit Sara's blog.

Also, I had no idea how to thread the sewing machine.  I thought I had it right, but after watching a very helpful video on You Tube, I discovered I had it wrong.  I also tested out a couple of different stitches for this project and a different one that I was doing the same day.

Let's start with what I used. 

First, the thread.  I just used white, but you could use any color your heart desired.


Then you need an old tea towel that only dries one dish.  Like this one.


I started by cutting off the finished edges of the tea towel. 


Then, I folded the tea towel in half lengthwise and cut on the folded edge, so I would have two pieces.


I marked with a pin 2 inches down from each short edge on all four ends, on both sides - so 8 pins in all.


I sewed both long sides with a single stitch 1/4 inch from each edge, starting after the pin and stopping just before the pin on the other end.

After the edges were finished, I folded back the un-sewn edges of the towels in the 2 inch sections to 1/4 inch.


Then sewed them down.


PS - this took FOREVER.

After that was done, each of the four short edges get folded over 1/4 inch.  Sara didn't sew these edges, but because of my inexperience, I decided to sew these edges down.


After all four short edges have been folded over 1/4 inch and sewed down, I folded the short edge over again so that the "finished edge" would meet the bottom of the 2 inch section.


Then I sewed those down.  This creates a casing for the drawstrings.

Turn the bag right-side out.


Remember those finished edges that I cut off in the beginning?  I kept those.


I used a safety pin and threaded those bits through the casing.


And that's it!

Now, it's not very pretty, and it's not perfect.  But as it will not be put on display in the Louvre any time soon, I'm not terribly concerned about it.


And I'm pretty happy with it.

I hope this maybe inspires you too!

This is the Cane girl - with very sore fingers from pinning - signing off.